# How to configure IAX Connection

## Question or Case description

This article explains how to configure an IAX connection between a CoCoS environment and an external PBX system.

An IAX connection allows calls to be exchanged between CoCoS and another telephone system. This makes it possible for intercoms, SIP devices, and other connected endpoints to communicate between both platforms.

Typical situations where this configuration is used:

- An intercom from an external PBX must be reachable from CoCoS
- Calls from CoCoS must be routed to another PBX
- An existing PBX environment must be integrated with CoCoS
- CoCoS call handling features must be made available to another system

Possible symptoms when the connection is not configured correctly:

- Intercom devices are unreachable
- Calls do not arrive
- Calls disconnect immediately
- The trunk registration fails
- Audio communication is not established

## Application

This configuration is commonly used when a CoCoS environment needs to communicate with another PBX using the Inter Asterisk eXchange (IAX) protocol.

Examples include:

- Connecting two PBX systems
- Migrating an existing intercom environment to CoCoS
- Integrating external SIP intercom devices
- Connecting multiple locations through IAX

## How To

#### Requirements

Before starting, verify that the following components are available:

- A working CoCoS environment
- A properly configured CoCoS Asterisk/PBX server
- An external PBX with IAX support
- Network connectivity between both systems
- IAX authentication credentials

#### Step 1 - Prepare the External PBX

First, configure an IAX trunk on the external PBX.

The exact configuration depends on the PBX vendor, but the following settings are typically required:

<table border="1" id="bkmrk-setting-value-userna" style="border-collapse: collapse; width: 100%; height: 147.613px;"><colgroup><col style="width: 28.2331%;"></col><col style="width: 71.7344%;"></col></colgroup><thead><tr style="height: 29.5227px;"><td style="height: 29.5227px;">Setting</td><td style="height: 29.5227px;">Value</td></tr></thead><tbody><tr style="height: 29.5227px;"><td style="height: 29.5227px;">Username</td><td style="height: 29.5227px;">IAX authentication username</td></tr><tr style="height: 29.5227px;"><td style="height: 29.5227px;">Password</td><td style="height: 29.5227px;">IAX authentication password</td></tr><tr style="height: 29.5227px;"><td style="height: 29.5227px;">Host / IP Address</td><td style="height: 29.5227px;">IP address of the CoCoS environment</td></tr><tr style="height: 29.5227px;"><td style="height: 29.5227px;">Port</td><td style="height: 29.5227px;">4569</td></tr></tbody></table>

<p class="callout warning">**Important:** The username and password must match exactly on both systems.</p>

#### Step 2 - Create a New IAX Trunk in CoCoS

<table border="1" id="bkmrk-open-the-cocos-manag" style="border-collapse: collapse; width: 100%; height: 449.625px;"><colgroup><col style="width: 50%;"></col><col style="width: 50%;"></col></colgroup><tbody><tr style="height: 297.943px;"><td style="height: 297.943px;">Open the CoCoS Management environment, and navigate to:

**Intercom → Trunks and Channels → Trunks**

</td><td style="height: 297.943px;">[![image.png](https://knowledgebase.cocos.software/uploads/images/gallery/2026-05/scaled-1680-/AjEQEmQc8Gpr30ni-image.png)
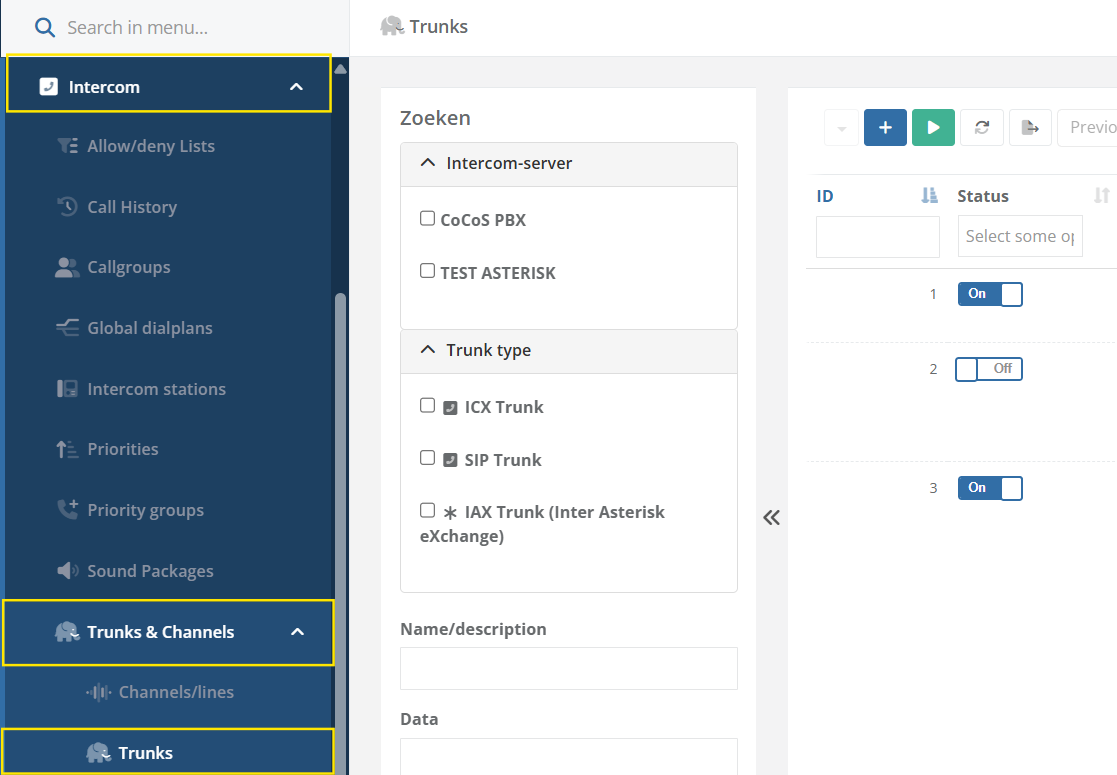
](https://knowledgebase.cocos.software/uploads/images/gallery/2026-05/AjEQEmQc8Gpr30ni-image.png)

</td></tr><tr style="height: 46.3182px;"><td style="height: 46.3182px;">Click the plus icon to create a new trunk.

</td><td style="height: 46.3182px;">[![image.png](https://knowledgebase.cocos.software/uploads/images/gallery/2026-05/scaled-1680-/rqmwavbEnETbElrJ-image.png)
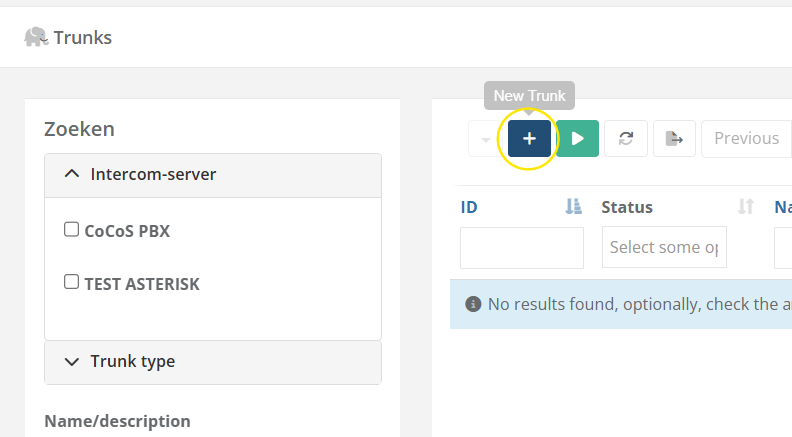
](https://knowledgebase.cocos.software/uploads/images/gallery/2026-05/rqmwavbEnETbElrJ-image.png)

</td></tr><tr style="height: 46.3182px;"><td style="height: 46.3182px;">Select the appropriate Asterisk/PBX server in the **Intercom Server** field.

</td><td style="height: 46.3182px;">[![image.png](https://knowledgebase.cocos.software/uploads/images/gallery/2026-05/scaled-1680-/3whETXCKOvhC2wSY-image.png)
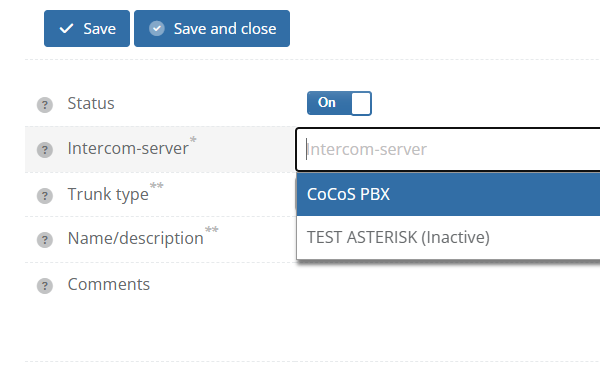
](https://knowledgebase.cocos.software/uploads/images/gallery/2026-05/3whETXCKOvhC2wSY-image.png)

</td></tr><tr style="height: 29.5227px;"><td style="height: 29.5227px;">Select the trunk type: **Inter Asterisk eXchange Trunk**.

</td><td style="height: 29.5227px;">[![image.png](https://knowledgebase.cocos.software/uploads/images/gallery/2026-05/scaled-1680-/do5TX6iYqGR8vRPv-image.png)
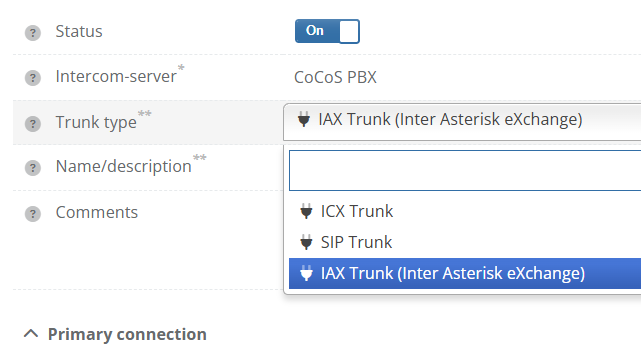
](https://knowledgebase.cocos.software/uploads/images/gallery/2026-05/do5TX6iYqGR8vRPv-image.png)

</td></tr><tr><td>Enter a clear and recognizable name in **Name / Description**.

</td><td>[![image.png](https://knowledgebase.cocos.software/uploads/images/gallery/2026-05/scaled-1680-/XVWpSYPspexSLKWW-image.png)
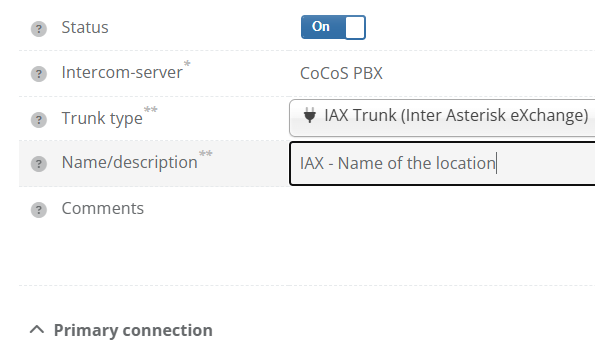
](https://knowledgebase.cocos.software/uploads/images/gallery/2026-05/XVWpSYPspexSLKWW-image.png)

</td></tr></tbody></table>

#### Step 3 - Configure the Basic Trunk Settings

<table border="1" id="bkmrk-enable-use-dynamic-h" style="border-collapse: collapse; width: 100%;"><colgroup><col style="width: 50%;"></col><col style="width: 50%;"></col></colgroup><tbody><tr><td>Enable **Use Dynamic Host** only when a dynamic host configuration is required.

Use this when the extenal PBX is going to connect to CoCoS, which is the case for most use cases currently )

</td><td>[![image.png](https://knowledgebase.cocos.software/uploads/images/gallery/2026-05/scaled-1680-/ju1Ft8SXyus9acpu-image.png)
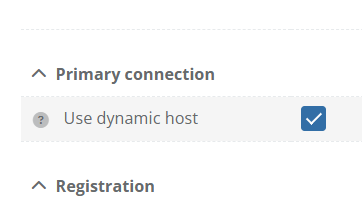
](https://knowledgebase.cocos.software/uploads/images/gallery/2026-05/ju1Ft8SXyus9acpu-image.png)

</td></tr><tr><td>If not using Dynamic Host:

Enter the IP address or domain name of the external PBX in **IP Address / Domain**, and enter the correct port number.

IAX normally uses port **4569**.

</td><td>[![image.png](https://knowledgebase.cocos.software/uploads/images/gallery/2026-05/scaled-1680-/RjokXkaWpWWmGZNo-image.png)
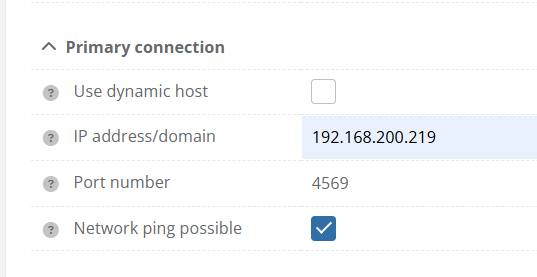
](https://knowledgebase.cocos.software/uploads/images/gallery/2026-05/RjokXkaWpWWmGZNo-image.png)

</td></tr><tr><td>Enter the IAX username in the **Username** field.

</td><td>  
</td></tr><tr><td>Enter the correct password in the **Password** field.

</td><td>[![image.png](https://knowledgebase.cocos.software/uploads/images/gallery/2026-05/scaled-1680-/FQ3KAyT7ZjzSbIYo-image.png)
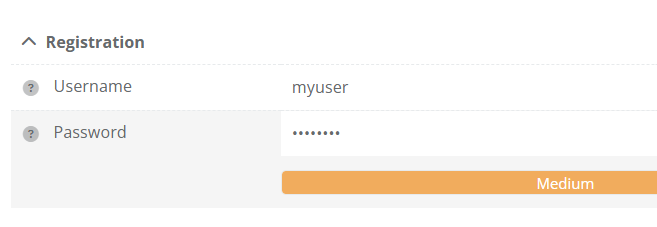
](https://knowledgebase.cocos.software/uploads/images/gallery/2026-05/FQ3KAyT7ZjzSbIYo-image.png)

</td></tr><tr><td>Click **Save and Close** to store the trunk configuration.

</td><td>  
</td></tr></tbody></table>

#### Step 4 - Link SIP/Intercom Devices to the Trunk

After creating the trunk, the external devices must also be created in CoCoS.

This allows CoCoS to know which calls should be routed through the IAX connection.

<table border="1" id="bkmrk-navigate-to%3A-system-" style="border-collapse: collapse; width: 100%; height: 1255.92px;"><colgroup><col style="width: 50%;"></col><col style="width: 50%;"></col></colgroup><tbody><tr style="height: 296.17px;"><td style="height: 296.17px;">Navigate to:

**System → Devices**

</td><td style="height: 296.17px;">[![image.png](https://knowledgebase.cocos.software/uploads/images/gallery/2026-05/scaled-1680-/HKymYsqf8k8ocznW-image.png)](https://knowledgebase.cocos.software/uploads/images/gallery/2026-05/HKymYsqf8k8ocznW-image.png)

</td></tr><tr style="height: 461.943px;"><td style="height: 461.943px;">Create a new **SIP endpoint** device.

</td><td style="height: 461.943px;">[![image.png](https://knowledgebase.cocos.software/uploads/images/gallery/2026-05/scaled-1680-/n99yUyNkDJJTF2ky-image.png)
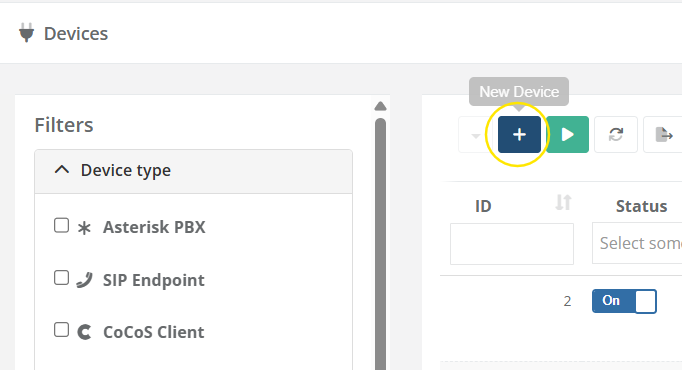
](https://knowledgebase.cocos.software/uploads/images/gallery/2026-05/n99yUyNkDJJTF2ky-image.png)

[![image.png](https://knowledgebase.cocos.software/uploads/images/gallery/2026-05/scaled-1680-/qhDavkTX069vLgOA-image.png)
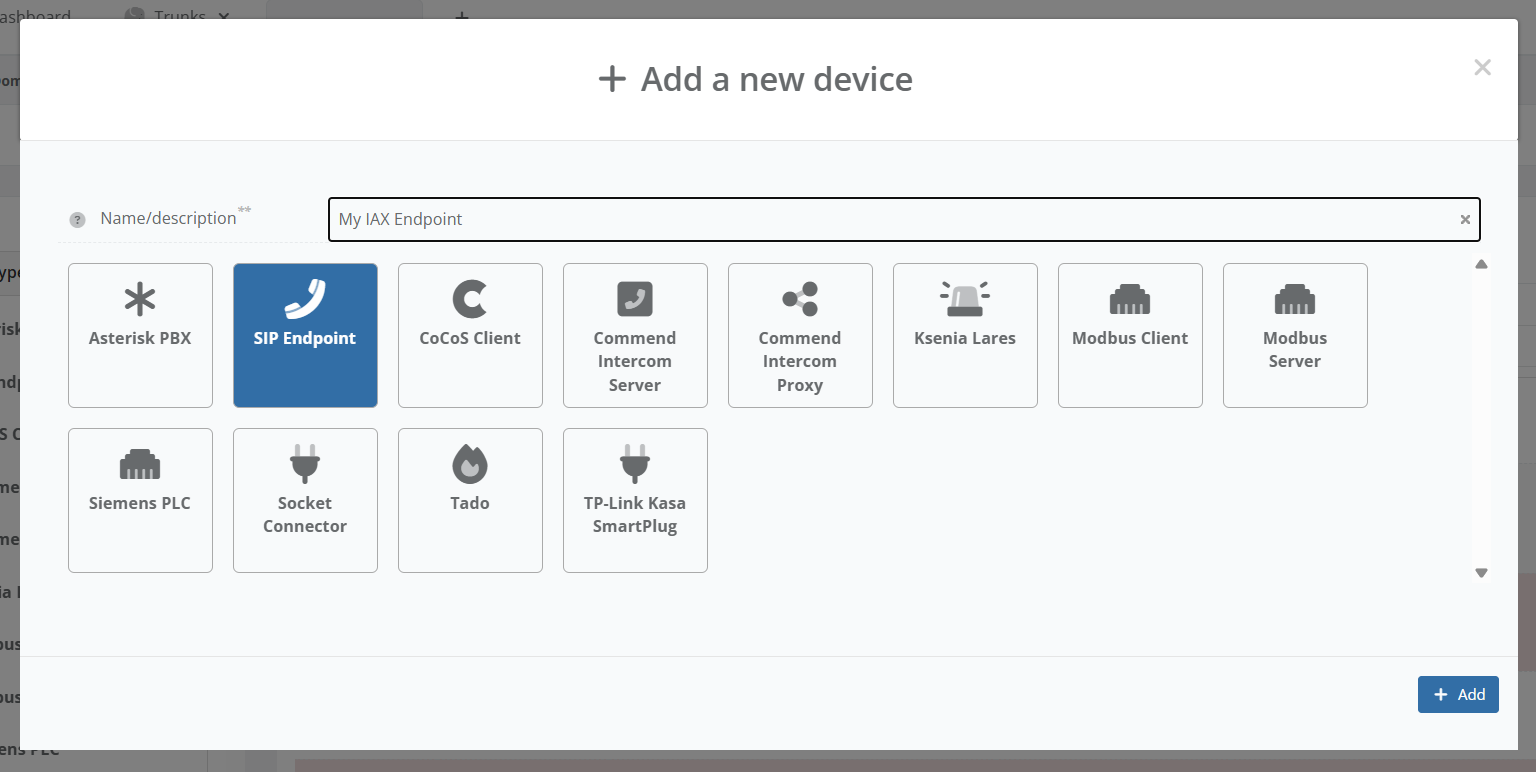
](https://knowledgebase.cocos.software/uploads/images/gallery/2026-05/qhDavkTX069vLgOA-image.png)

</td></tr><tr style="height: 219.852px;"><td style="height: 219.852px;">Enter the **extension number** of the external device.

</td><td style="height: 219.852px;">[![image.png](https://knowledgebase.cocos.software/uploads/images/gallery/2026-05/scaled-1680-/E5y2rmuzjhbjzHKZ-image.png)
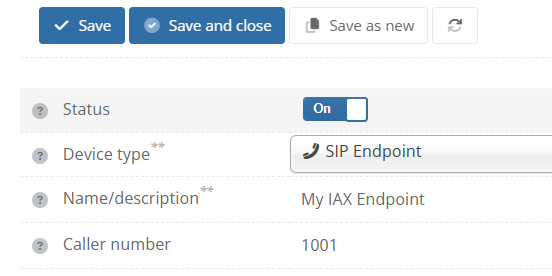
](https://knowledgebase.cocos.software/uploads/images/gallery/2026-05/E5y2rmuzjhbjzHKZ-image.png)

</td></tr><tr style="height: 218.909px;"><td style="height: 218.909px;">Link the device to the previously created IAX trunk.

</td><td style="height: 218.909px;">[![image.png](https://knowledgebase.cocos.software/uploads/images/gallery/2026-05/scaled-1680-/wIfyx2XpMtWWkGcW-image.png)
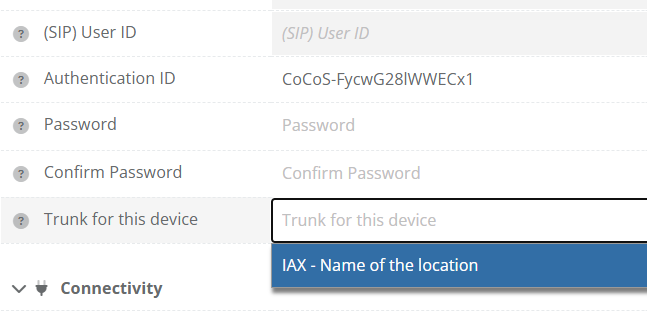
](https://knowledgebase.cocos.software/uploads/images/gallery/2026-05/wIfyx2XpMtWWkGcW-image.png)

</td></tr><tr style="height: 29.5227px;"><td style="height: 29.5227px;">(Optional) You may need to change SIP transport protocol to UDP.

</td><td style="height: 29.5227px;">[![image.png](https://knowledgebase.cocos.software/uploads/images/gallery/2026-05/scaled-1680-/kQVAR5INW5U9Tsql-image.png)
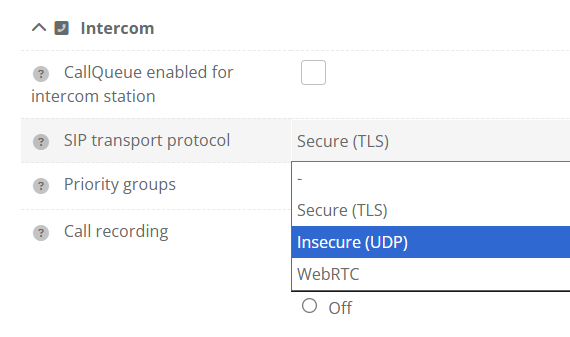
](https://knowledgebase.cocos.software/uploads/images/gallery/2026-05/kQVAR5INW5U9Tsql-image.png)

</td></tr><tr><td>Disable registration monitoring since there is no registration to monitor.

</td><td>[![image.png](https://knowledgebase.cocos.software/uploads/images/gallery/2026-05/scaled-1680-/zrIALbdgBaBoMVTu-image.png)
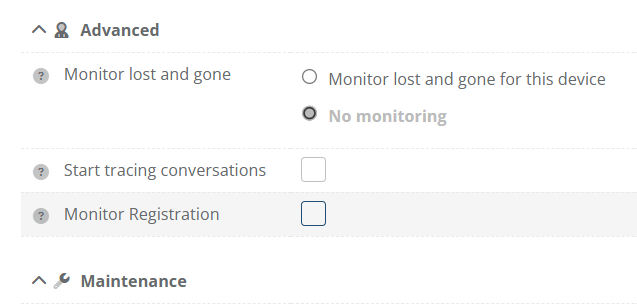
](https://knowledgebase.cocos.software/uploads/images/gallery/2026-05/zrIALbdgBaBoMVTu-image.png)

</td></tr><tr style="height: 29.5227px;"><td style="height: 29.5227px;">Click **Save and Close** to store the device configuration.

</td><td style="height: 29.5227px;">  
</td></tr></tbody></table>

> Repeat these steps for every device that must be reachable through the IAX connection.

## Validation

The configuration is considered successful when:

- The trunk registers successfully
- Both systems can reach each other
- Calls work in both directions
- Audio communication functions correctly
- No authentication or other errors appear in the logs

#### Test Scenario 1 - External PBX to CoCoS

<table border="1" id="bkmrk-test-expected-result" style="border-collapse: collapse; width: 100%;"><colgroup><col style="width: 50%;"></col><col style="width: 50%;"></col></colgroup><thead><tr><td>Test</td><td>Expected Result</td></tr></thead><tbody><tr><td>Call a CoCoS intercom from a device on the external PBX.</td><td>The CoCoS intercom rings and a call can be established.</td></tr></tbody></table>

#### Test Scenario 2 - CoCoS to External PBX

<table border="1" id="bkmrk-test-expected-result-1" style="border-collapse: collapse; width: 100%; height: 59.0454px;"><thead><tr style="height: 29.5227px;"><td style="height: 29.5227px;">Test</td><td style="height: 29.5227px;">Expected Result</td></tr></thead><tbody><tr style="height: 29.5227px;"><td style="height: 29.5227px;">Call a device on the external PBX from a CoCoS intercom.</td><td style="height: 29.5227px;">The external device rings and a call can be established.</td></tr></tbody></table>

## Common Causes of Issues

<table border="1" id="bkmrk-problem-likely-cause" style="border-collapse: collapse; width: 100%; height: 59.0454px;"><colgroup><col style="width: 50%;"></col><col style="width: 50%;"></col></colgroup><thead><tr style="height: 29.5227px;"><td style="height: 29.5227px;">Problem</td><td style="height: 29.5227px;">Likely Cause</td></tr></thead><tbody><tr style="height: 29.5227px;"><td style="height: 29.5227px;">Trunk registration fails</td><td style="height: 29.5227px;">Incorrect username or password</td></tr><tr><td>No connection possible</td><td>Firewall or network restriction</td></tr><tr><td>Calls fail immediately</td><td>Incorrect IP address or port number</td></tr><tr><td>One-way audio</td><td>NAT or firewall configuration</td></tr><tr><td>Devices unreachable</td><td>Endpoint not linked to the trunk</td></tr></tbody></table>

## References

Describe where to find external answers or extra information's