Dail to multiple numbers - creating a call sequence
Description
IMPORTANT NOTE REGARDING NESTED SEQUENCES AND GROUPSForNested nowcall it's only possible to usegroups a sequencenot ORconfigurable afor group.CoCoS versions lower then v5.2. It's not yet possible to use sequences in groups and visevice versa. Although it's already configurable in CoCoS, the intercomservers that have to execute a nested sequence or group cannot handle the complexity of such instruction (yet).
Dialing to a callgroup (multiple numbers in) a nut shell
In CoCoS it's possible to configure calling to multiple intercom and phone-numbers in 3 different way's:
- Sequences
- Group call : first to answer
- Group call : conference call.
In addition to the calls, we also have all-call for and selective selective-call for PA systems.
Case description call sequence
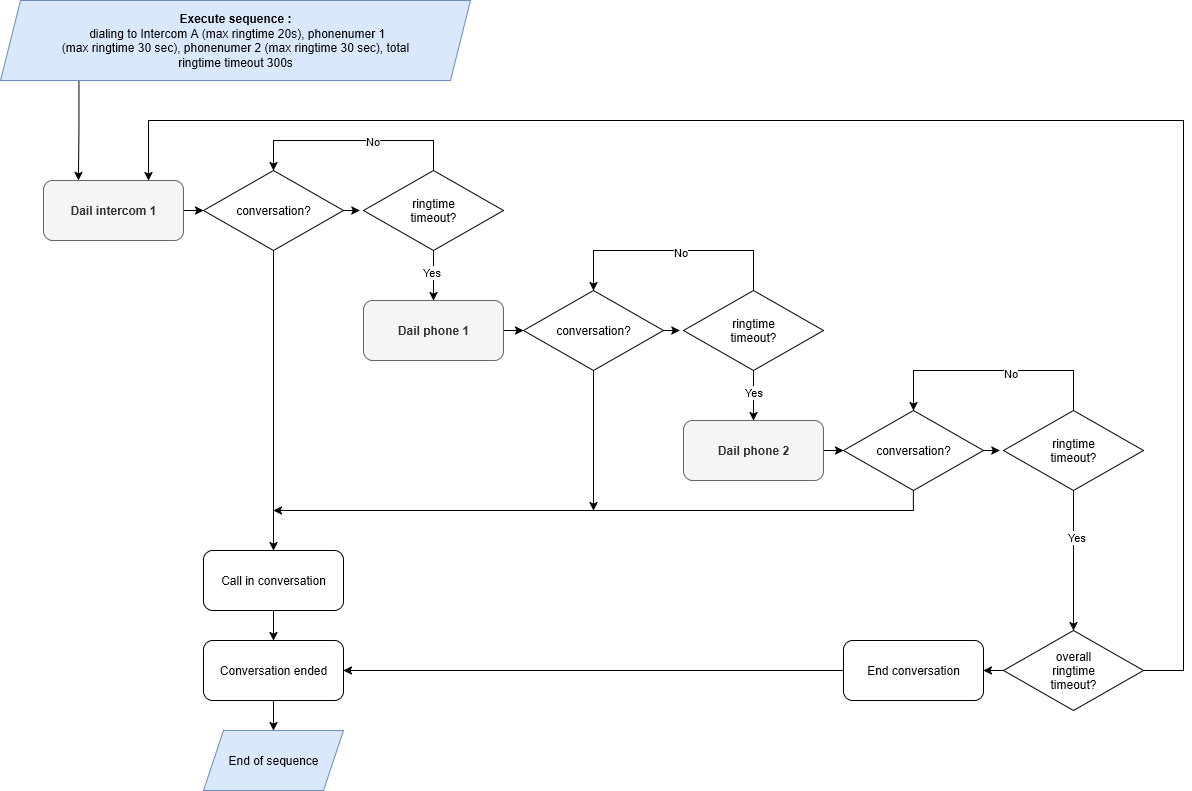
A call sequence makes it possible to dial to multiple numbers one by one. Visualized a sequences looks like this:
How To Create A Sequence
|
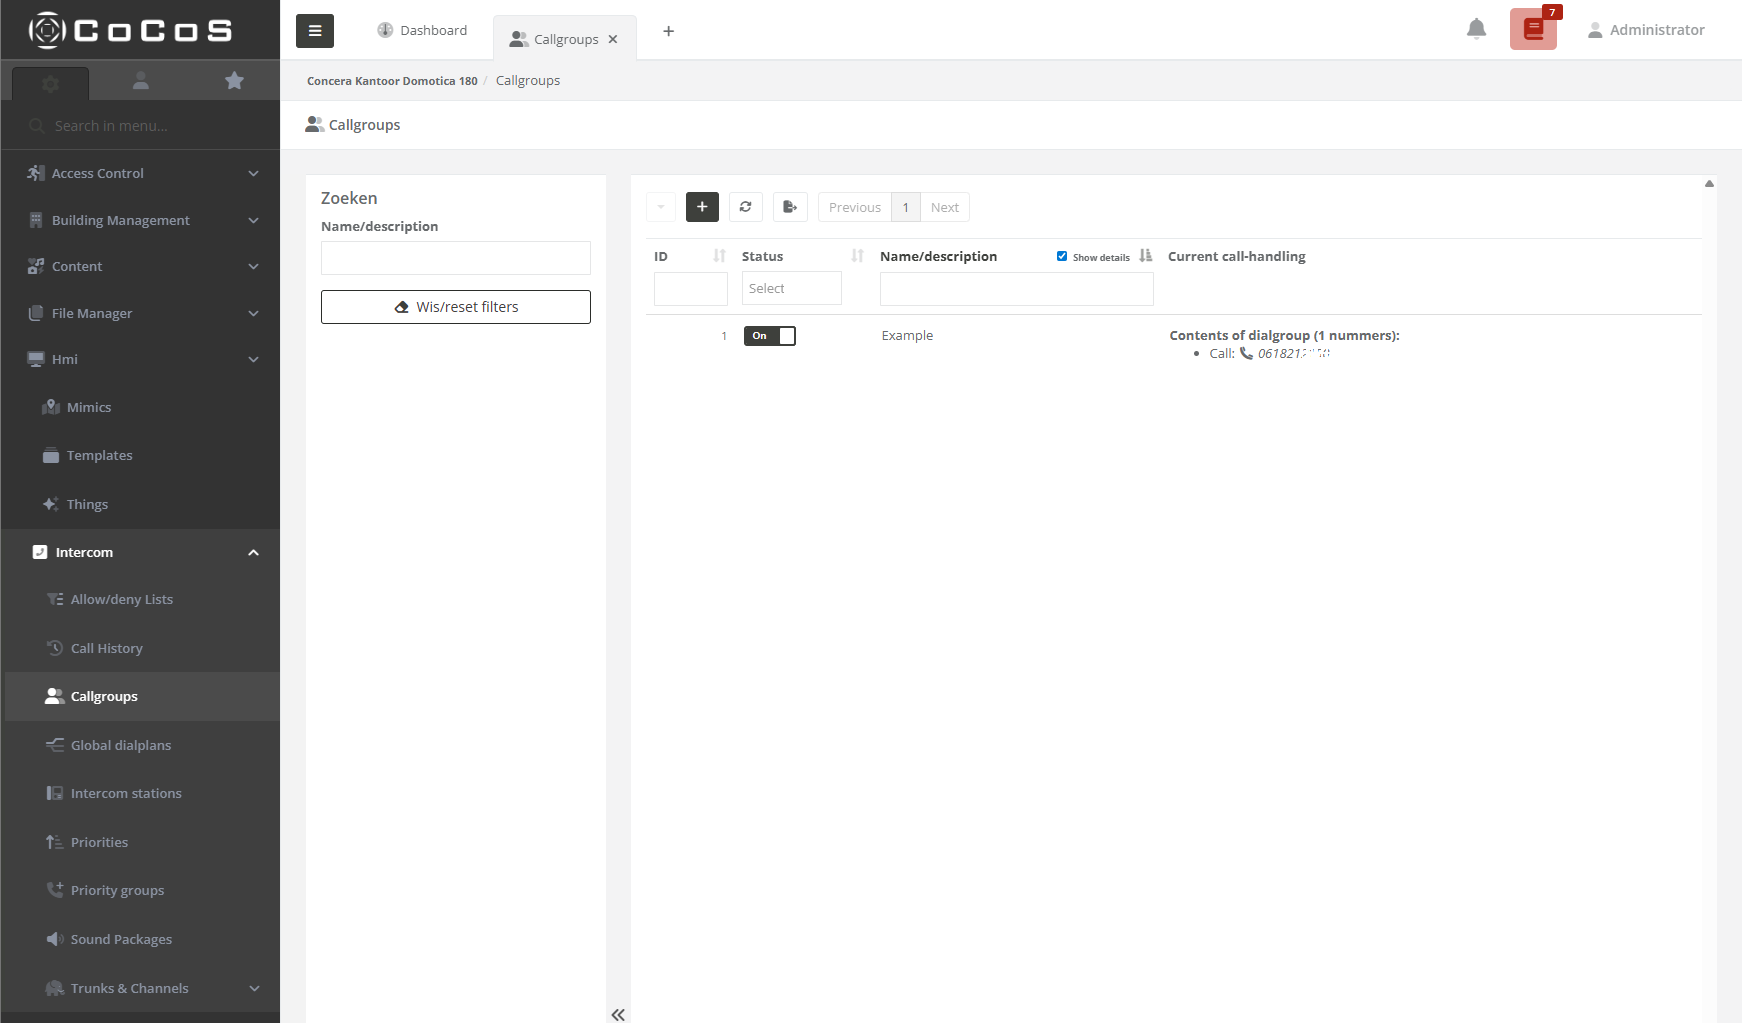
Step 1
Open the callgroup manger in the intercom menu. |
|
|
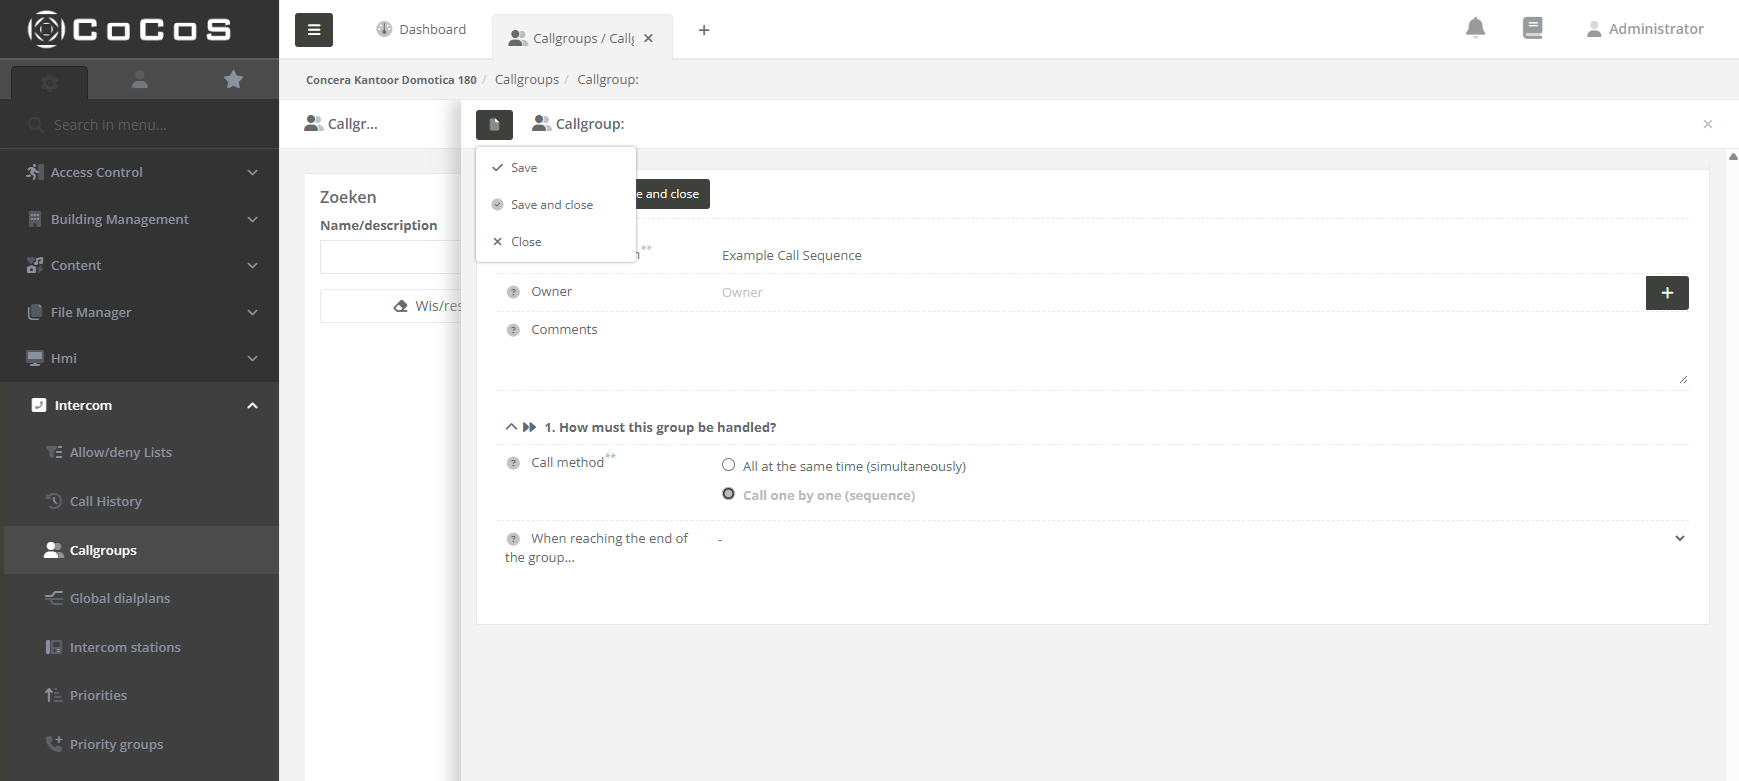
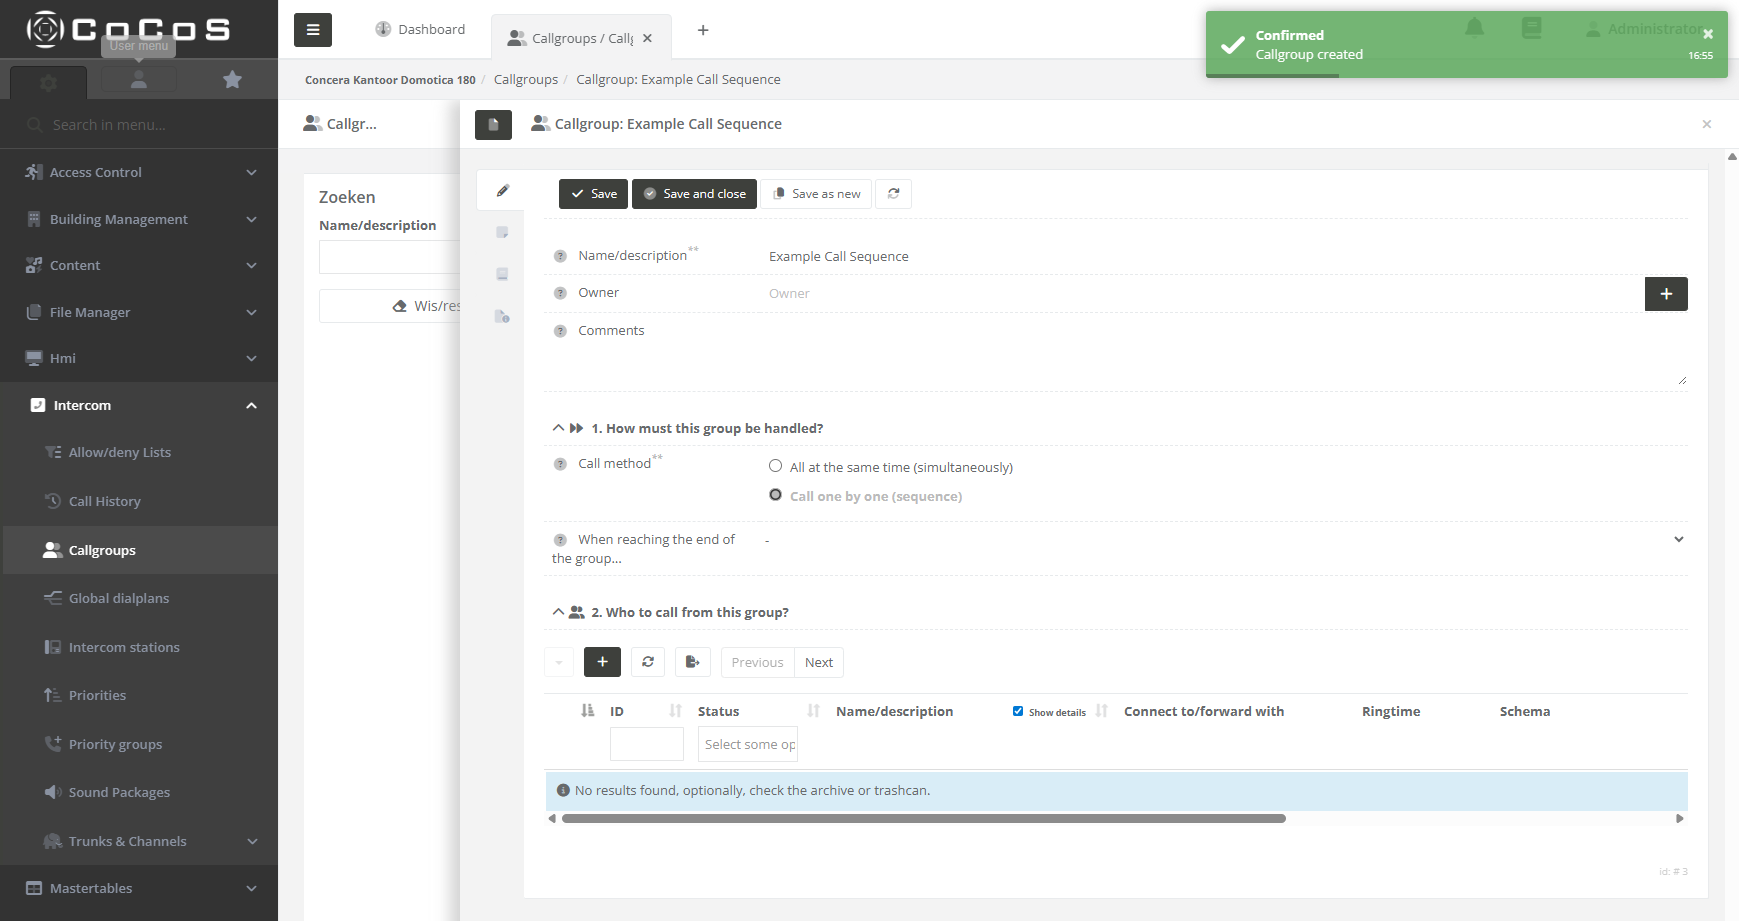
Step 2 Click the [ + ] button to create a new call-group. Enter a name (in the example we use exmaple call sequence) and select what type of call-method is used. In this case we use the "Cal one by one (sequence)" and then press [ Save ] |
|
|
When saved, the system will confirm the creation of the group by
|
|
|
Step 3
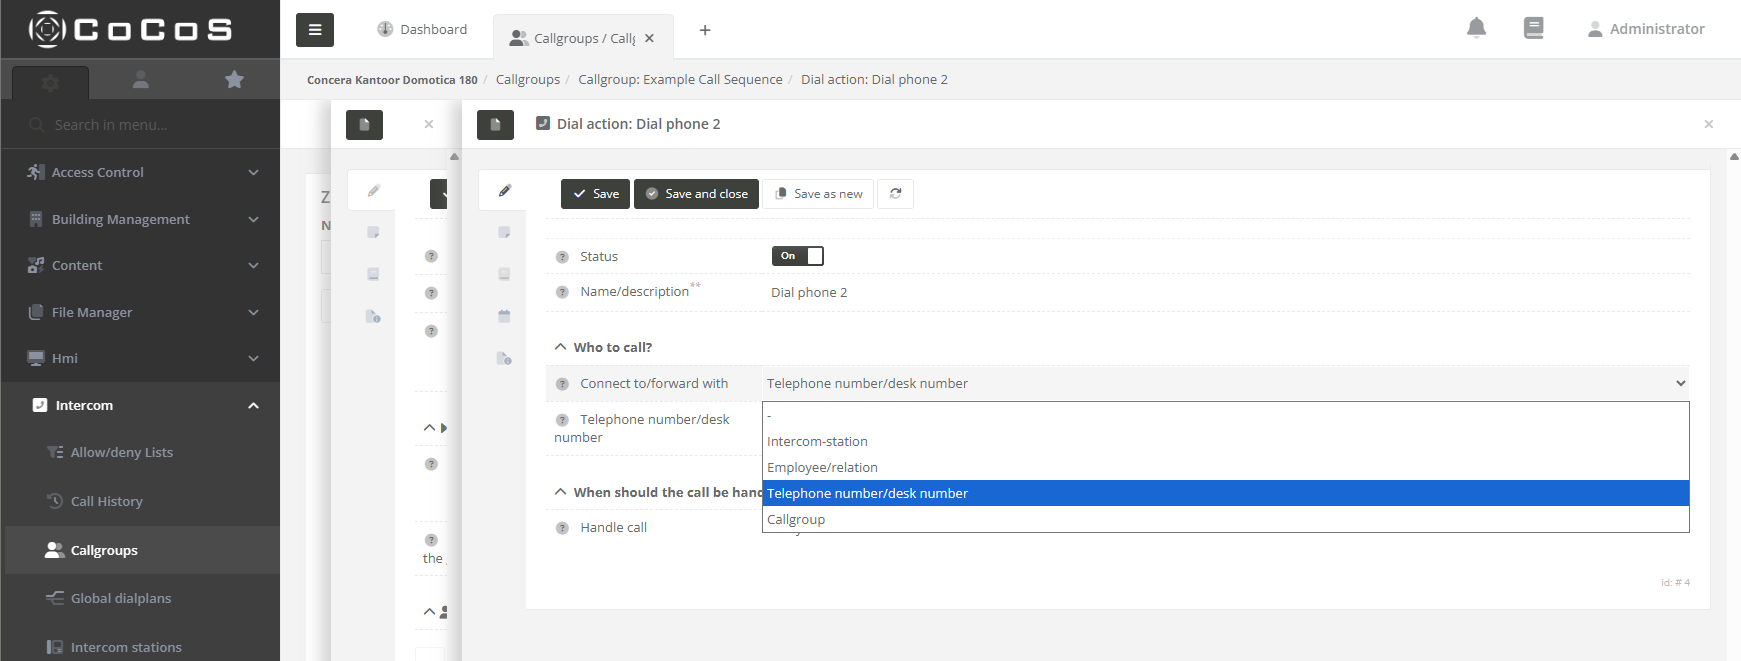
To add a
|
|
|
The next step is to add all targets required for the call sequence. You may use:
Note that the option "Call Group" as target is not yet supported up till version 5.0, nested call groups a available from version 5.2
|
|
|
Step 4
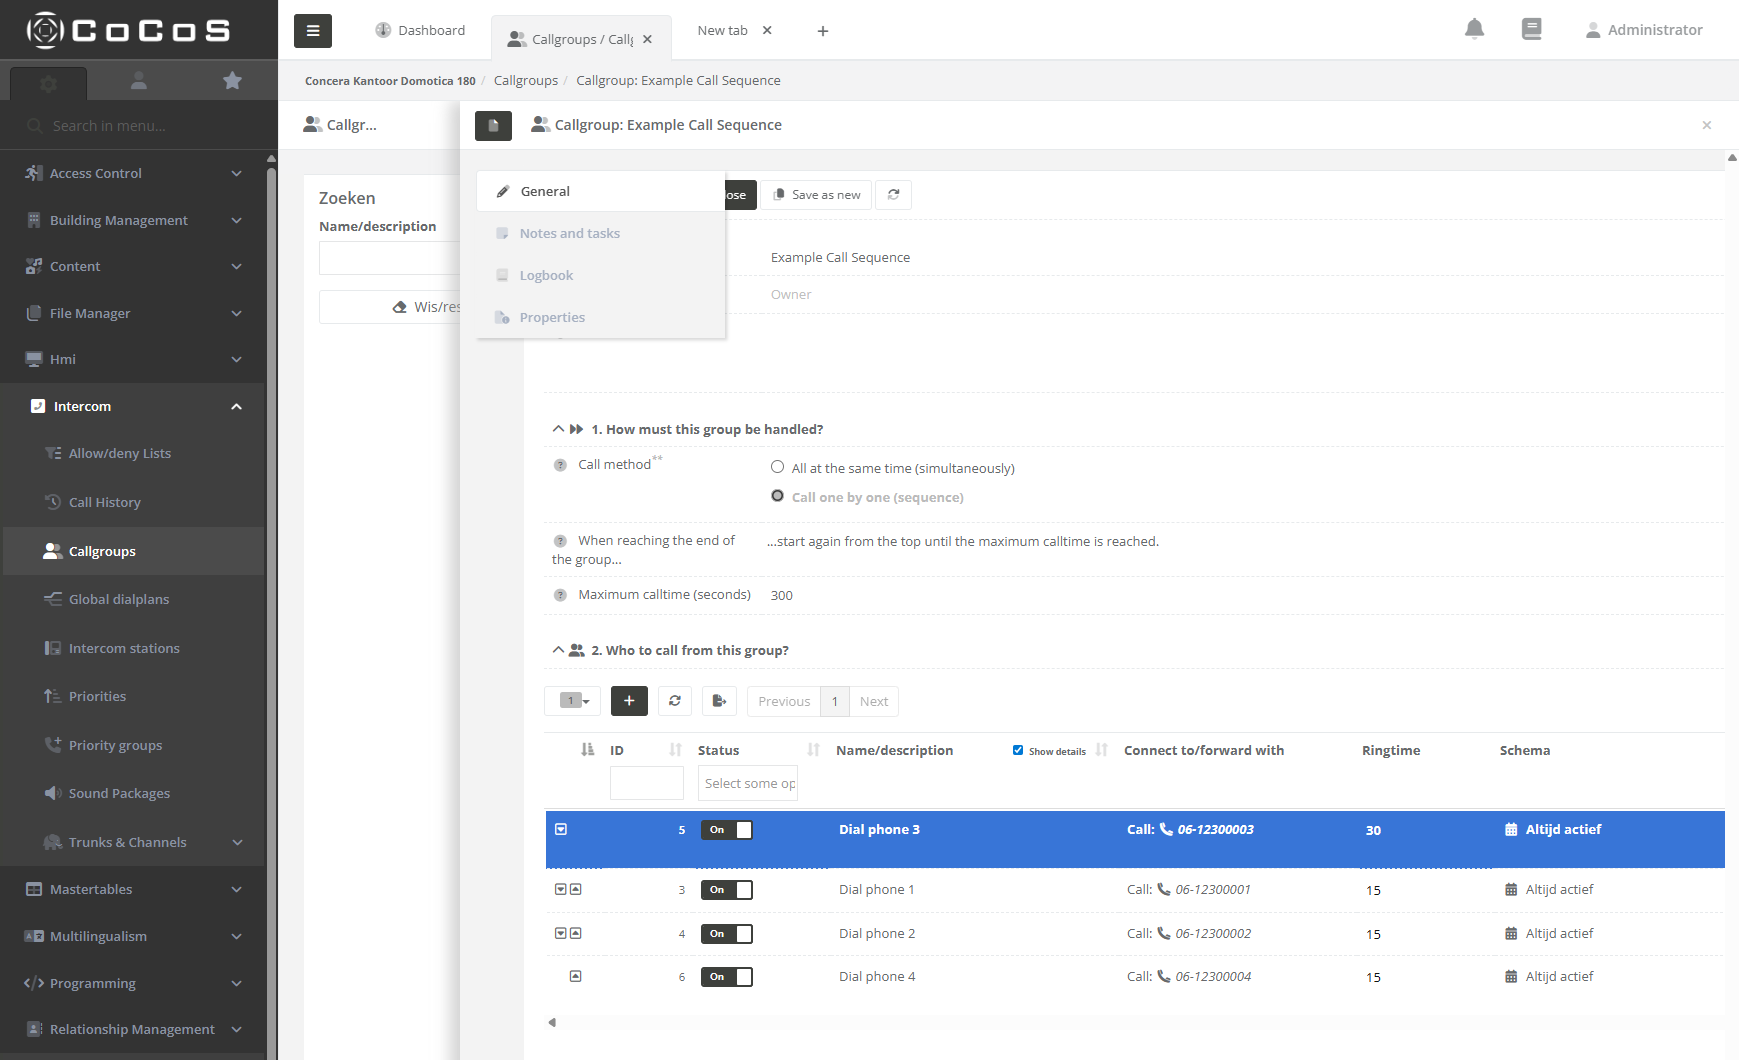
Once all targets are entered, you can configure the ring time for each target and, if necessary, adjust their order. In our example, we moved Phone 3 to the top of the sequence and set its ring time to 30 seconds. The sequence is now as follows:
Since we selected the option "Start again from the top until the maximum call time of 300 seconds is reached," the sequence will repeat from the beginning until a call is answered or the 300 second limit is reached.
When ready, hit [ save and close ] |
|
|
|
|

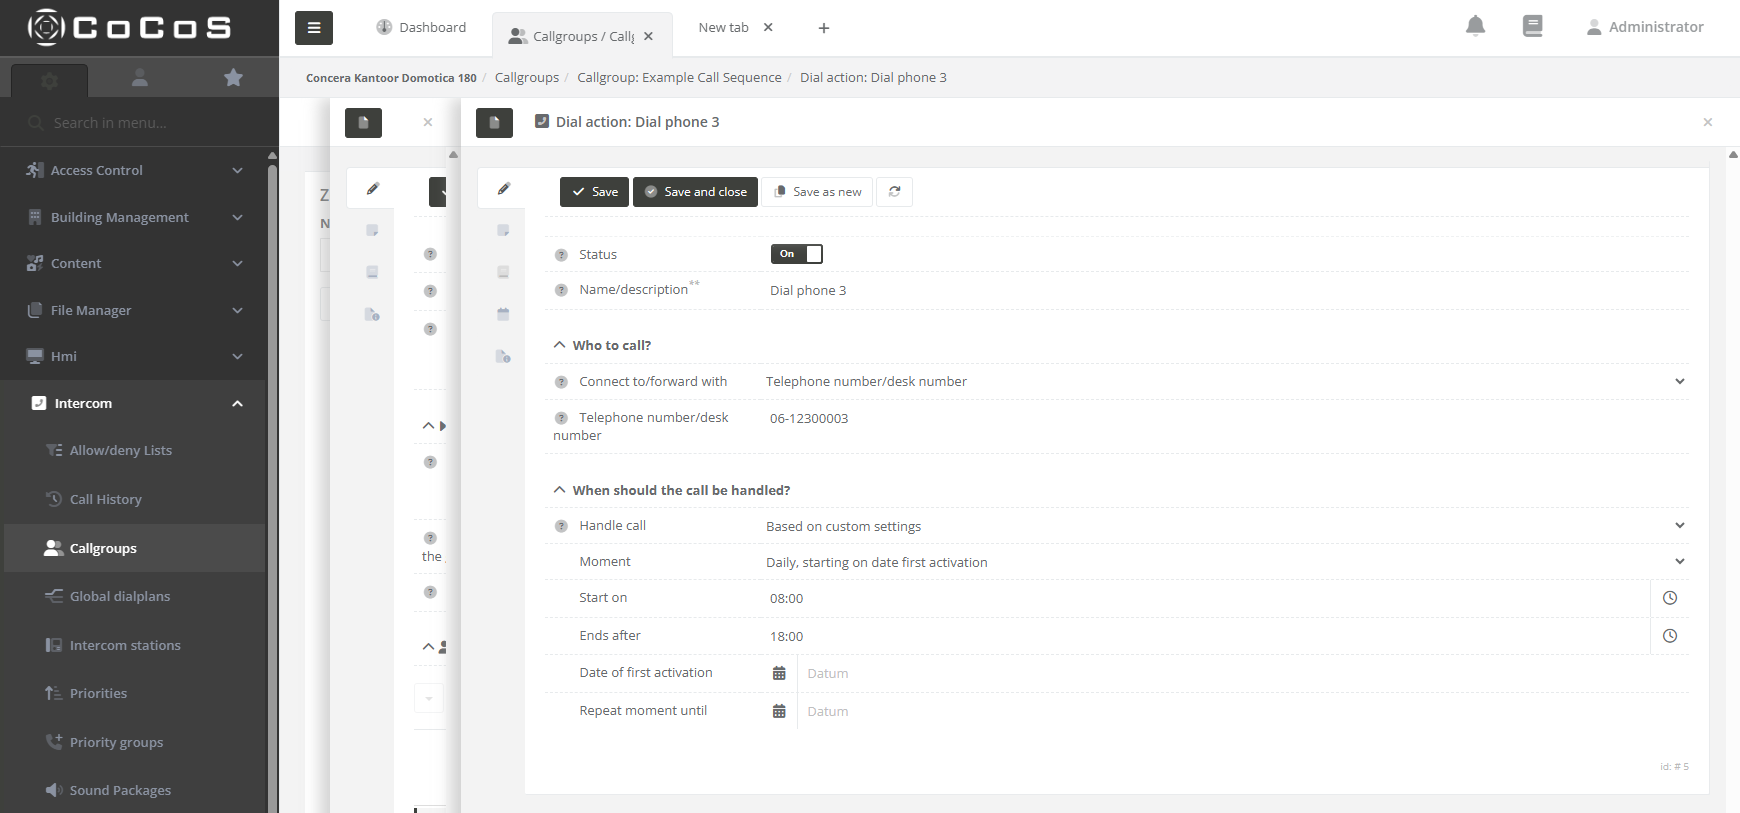
Custom Settings
It's possible to add some conditions to the target when configured in the sequence. We can select "Based on custom settings" in the "Handle call" setting.
|
Daily, starting on date first activation
The target is only enabled in the call sequence if the date and time match the configuration.
This means the target will be active every day, starting from the first activation date, until the repeat-until date is reached (if specified).
|
|
|
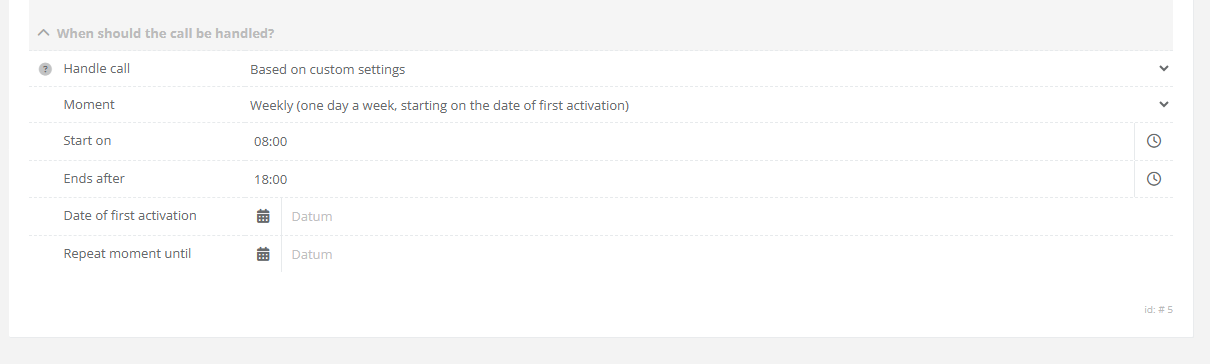
One day a week starting on the date of first activation.
The weekly schedule also begins on the date of first activation. For example, if the first activation occurs on a Wednesday, the target will be enabled every Wednesday thereafter.
If a "Repeat Until" date is configured, the target will automatically be disabled in the sequence once that date is reached.
|
|
|
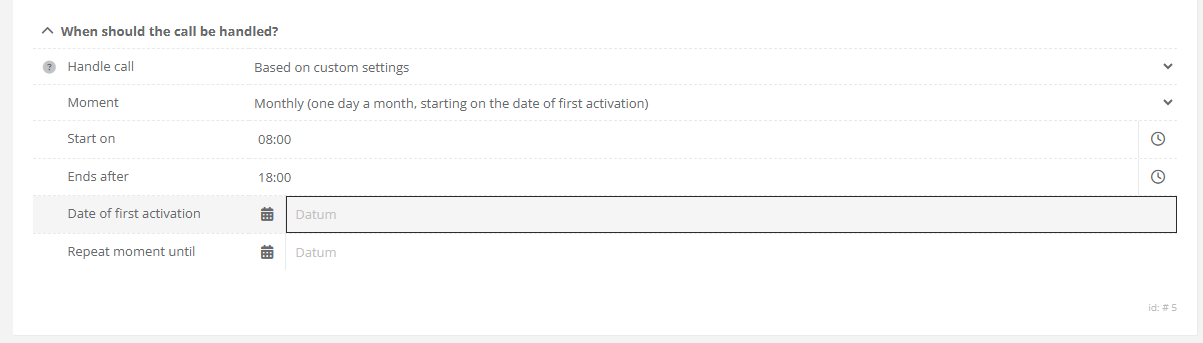
One day a month starting on the date of first activation.
The monthly schedule begins on the date of first activation. For example, if the activation date is the 13th of the month, the target will be enabled on the 13th of every subsequent month.
The schedules takes the real day of the month, so take in mind that not every month has the same number of days.
|
|
|
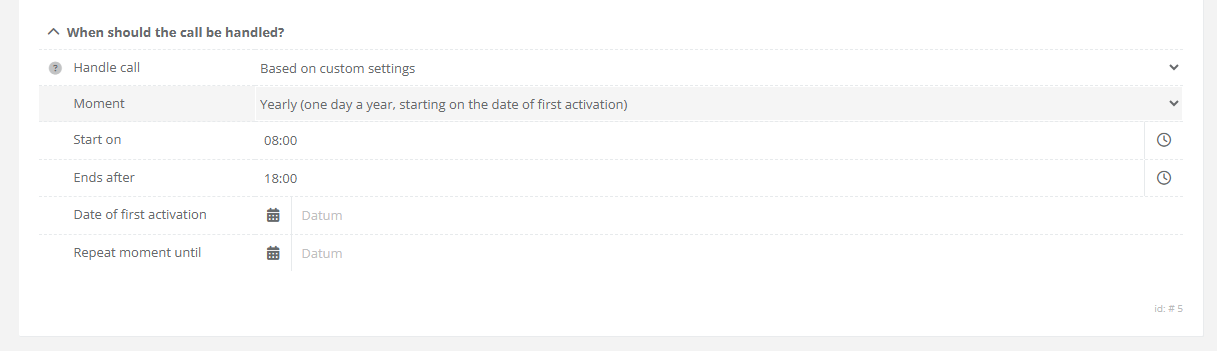
One day a year starting on the date of first activation.
This schedule can be use for configuring fixed holiday's for example. Take chrismas or new years day.
If a "Repeat Until" date is configured, the target will be disabled in the sequence after that date is reached.
|
|
|
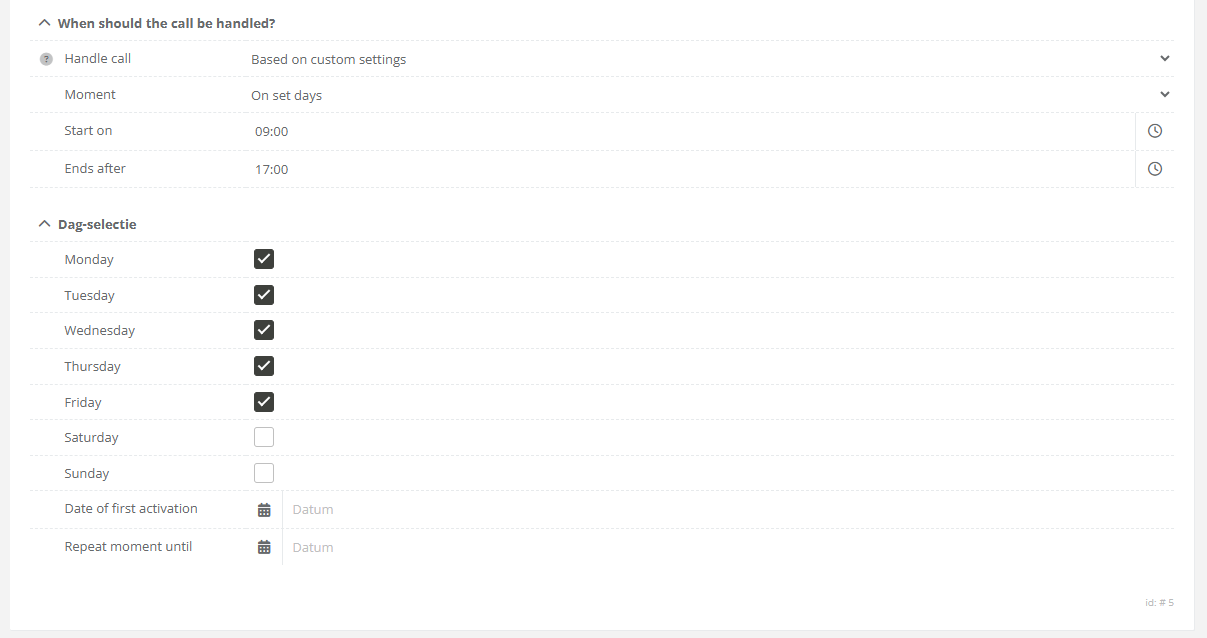
On set days.
Use this scheduling option whenever a specific target (for example the reception of an office) needs to be included in the secuence on work days.
In the example we configured the target to be enabled in the sequence from monday to friday from 9:00 till 17:00. |
|
|
|
|