How to control an Output on a MOXA ioLogik using the CoCoS MOXA connector
Question or Case description
This article describes how to configure and control outputs on Moxa ioLogik devices using the new device connector in CoCoS.
The connector replaces the previous script-based method, providing a more user-friendly and reliable way to manage digital inputs and outputs.
Use this article when you want to:
-
Create a Moxa ioLogik device in CoCoS.
-
Control its digital outputs (turn ON/OFF or pulse).
-
Read its input statuses.
Application
The Moxa ioLogik device is typically used to control external systems such as doors, gates, etc.
This setup allows CoCoS to trigger digital outputs through a direct device connector, without the need for custom scripts or webhooks.
How To
Follow the steps below to add and configure the Moxa ioLogik device, and control its outputs.
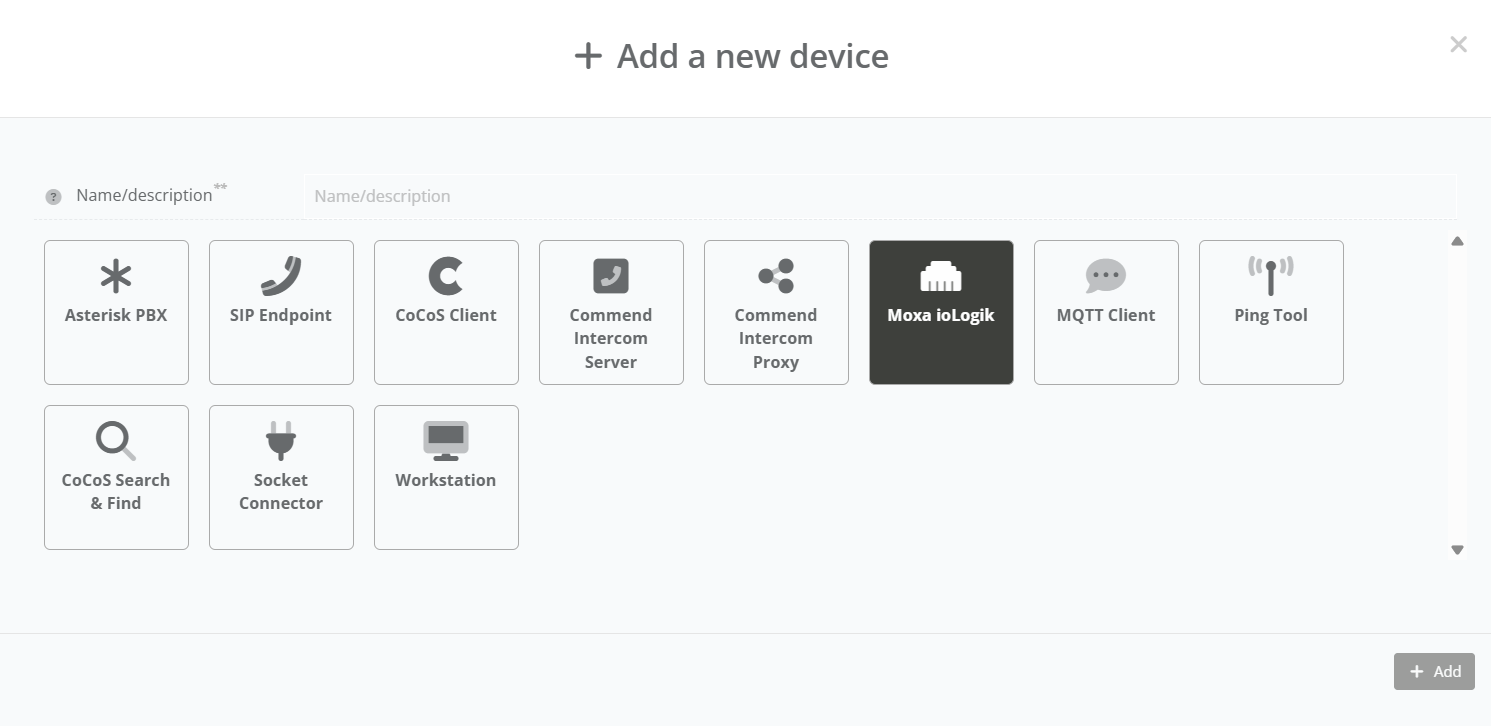
| Step 1: Navigate to "System / Devices", and click on the new device button. |
|
|
Step 2: Enter a clear and descriptive Device Name (for example: “Location - Moxa ioLogik”). |
|
|
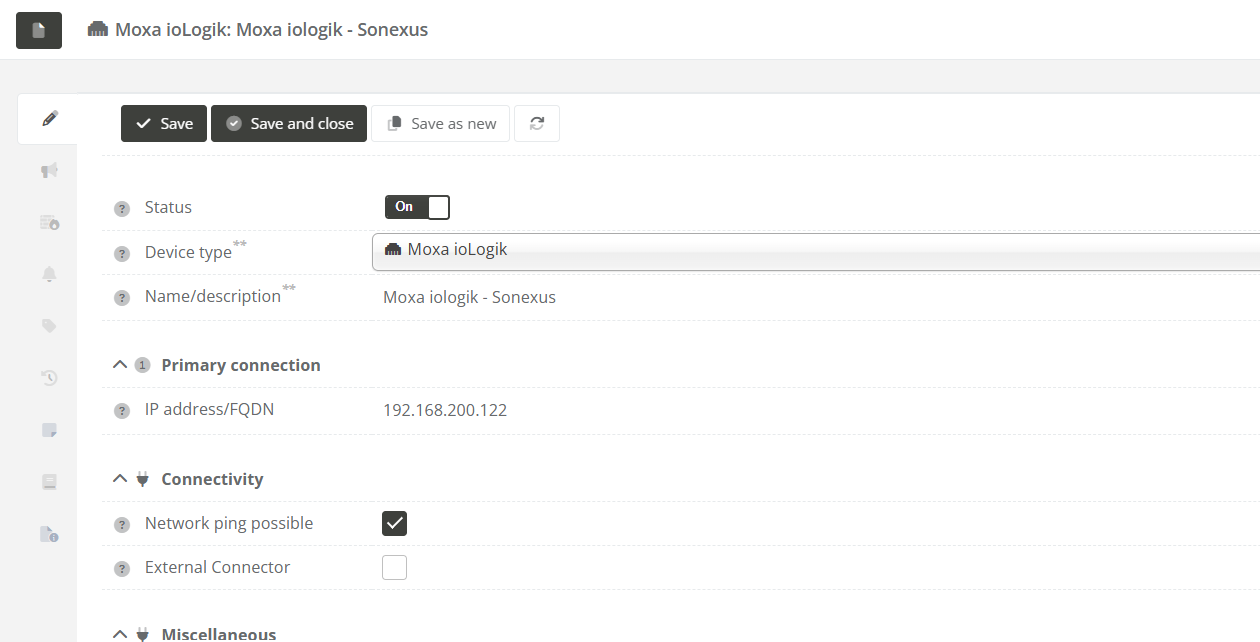
Step 3: In the device configuration panel: |
|
|
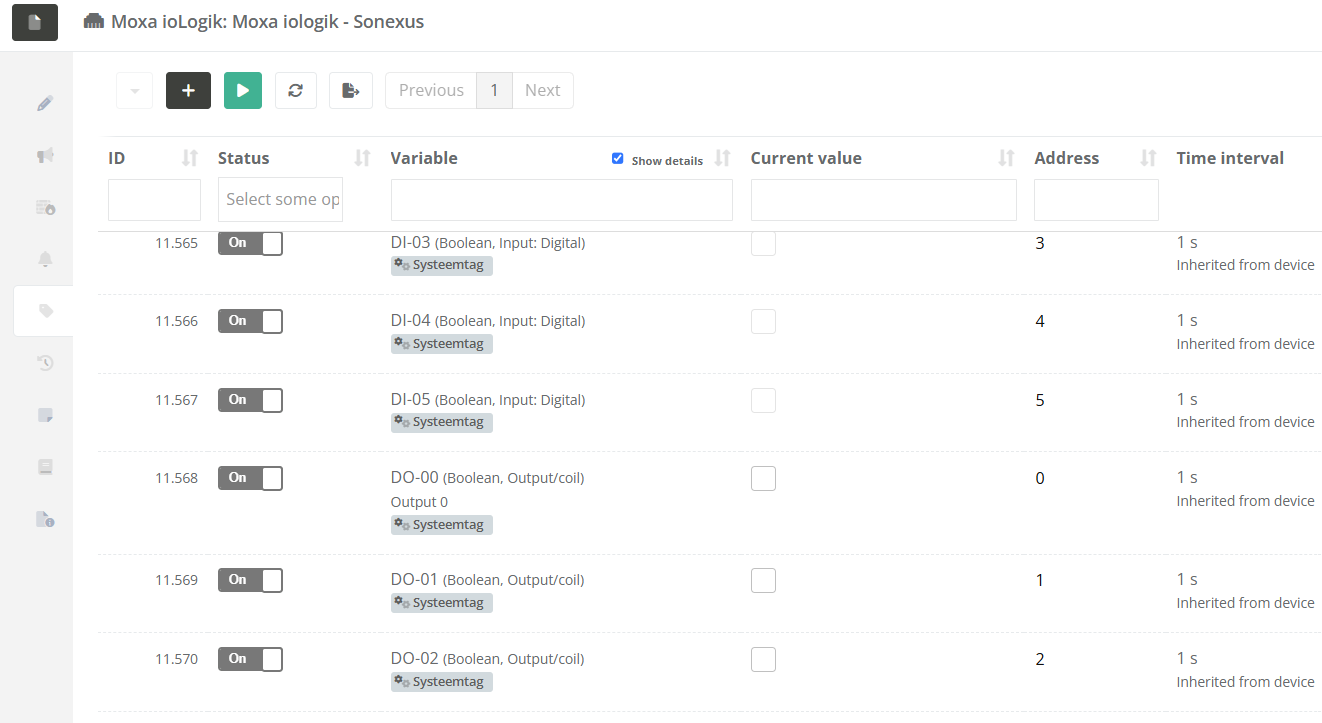
Step 4: After saving, the device will automatically create a list of Tags. These tags represent the available inputs and outputs on the Moxa ioLogik. |
|
|
Step 5: To control an output, use the corresponding tag: - Set the tag value to on / off. - Set the tag value to milliseconds for sending a pulse. |

Validation
To verify that the device and outputs are working correctly:
-
Open the Device view in CoCoS.
- Check that the device shows as Running.
-
Toggle an output and observe the physical response (e.g., relay click, light indicator, or external system activation).
If the device does not respond / has status error:
-
Ensure the IP address and network connection are correct.
-
Confirm that the Moxa ioLogik is powered and reachable.
- Ensure "Restful API" is enabled on the Moxa ioLogik.
No comments to display
No comments to display