MOXA ioLogik Output control via Script
Please use the custom device type "Moxa ioLogik" instead.
Introduction
This use case describes how to configure a (CoCoS) script for controlling outputs on a MOXA ioLogik device.
Step by step implementation
To configure this use case, follow these steps:
- Create a (Ping) device to represent our MOXA.
- Create a script for handling our MOXA outputs.
- Create relay tag(s) under our device to represent our output(s).
- Testing.
1. Create device
To keep handling of the MOXA relays/outputs on a single place we will create a device for our MOXA by following the following steps:
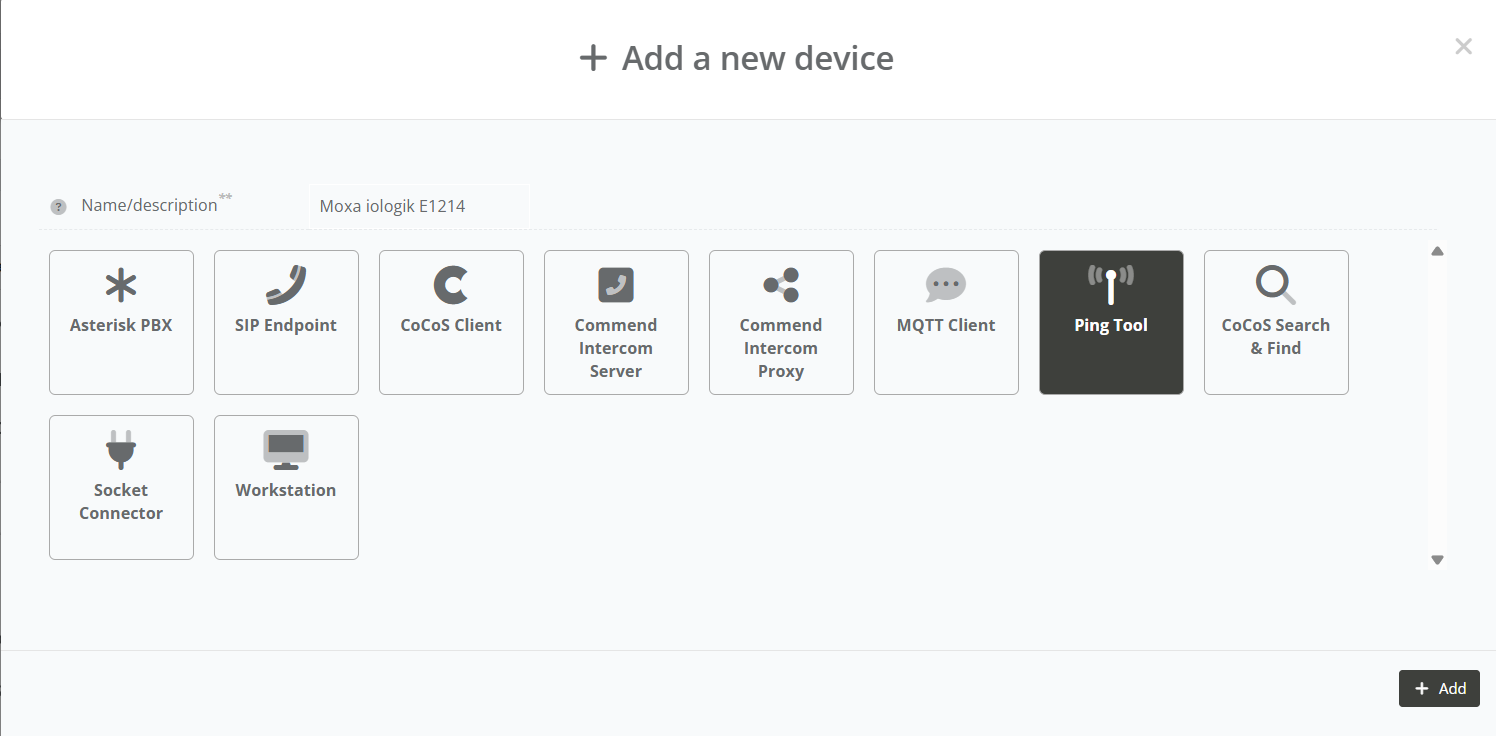
| Step 1: Navigate to "System / Devices", and click on the new device button. |
|
|
Step 2: Type a name for the device (like: "Location - MOXA ioLogik"), choose the "Ping tool" device type, and click on the add button. |
|
|
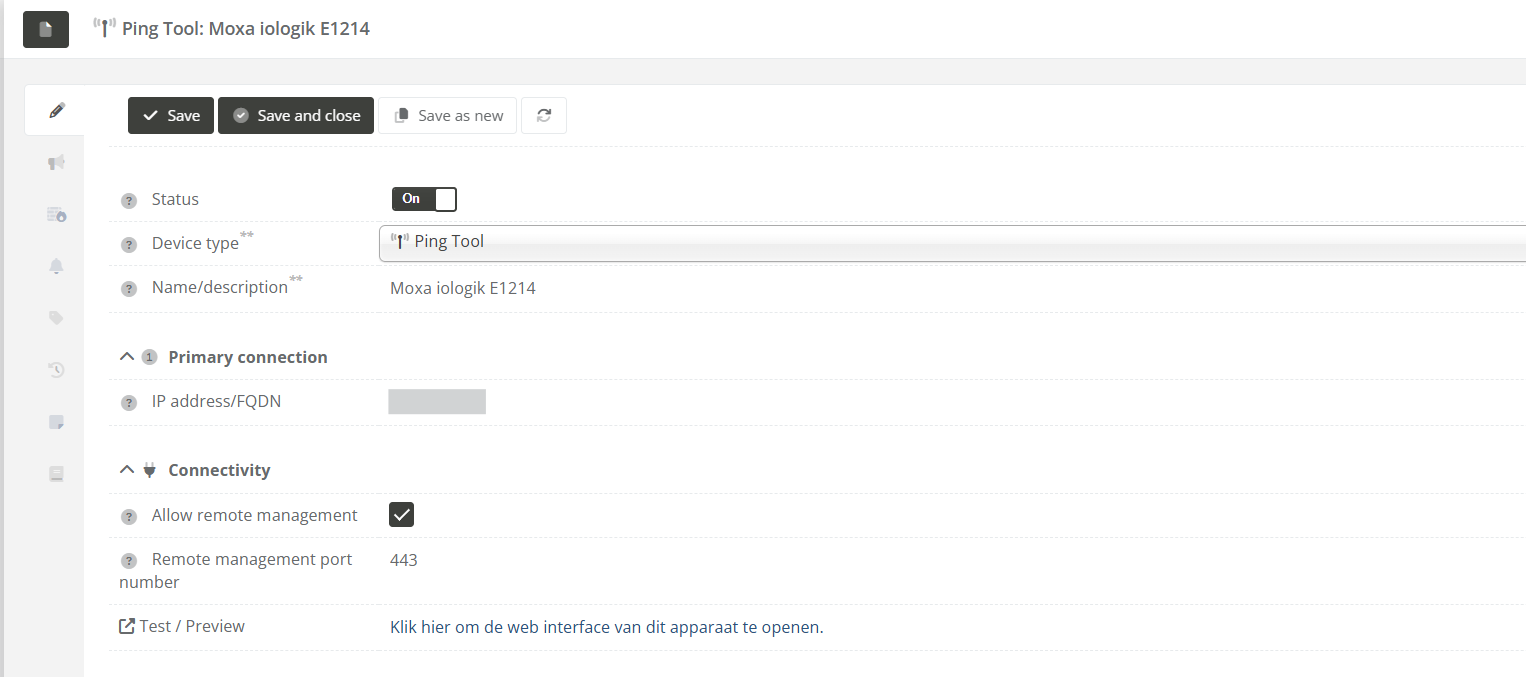
Step 3: Fill in the "IP address" field, set the status to "On", and click on the save button. |
|

2. Create script for output control
For controlling relays/outputs on our MOXA ioLogik we have to create a script.
| Step 1: Navigate to "Programming / Scripts" (or "System / Scripts" in versions before 5.1.0), and click on the new script button. |
|
| Step 2: Paste the following script into the "Script" field. |
(See the script bellow) |

The following script can be used for one device, with one or more relay tags (for creating these tags see: 3. Create relay/output tag(s)).
// ---------------------------------------------------------------------
// BASE CONFIGURATION
//
$host = 'x.x.x.x'; // Host / IPAddress of the device to preform
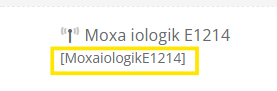
$deviceName = 'MoxaiologikE1214'; // Name of the MOXA device without any spaces
$slot = 0; //
// ---------------------------------------------------------------------
// INIT VARIABLES.
//
// Get the value or use $source to get the tag value from the source tag
if(isset($value) && !empty($value)){
$state = $value;
}
else {
$state = $cocos->tagGet($source);
}
// Get the output/relay to use based on the source tag name
//
$relayTagPrefix = 'device_'.$deviceName.'.relay_';
if(!str_starts_with($source, $relayTagPrefix)) {
$cocos->logError('Invalid $source argument for script. Source \''.$source.'\' does not match required tag name prefix \''.$relayTagPrefix.'\'.');
return;
}
$relay = str_replace($relayTagPrefix, '', $source);
// Prepare our request URL.
// For more info on http request to moxa check: https://www.moxa.com/Moxa/media/PDIM/S100000327/moxa-iologik-e1200-series-manual-v15.2.pdf
$url = 'http://' . $host . '/api/slot/' . $slot . '/io/relay/' . $relay . '/relayStatus';
// ---------------------------------------------------------------------
// CALL THE OUTPUT.
//
// Prepare our request data
$data = json_encode(array(
'slot' => $slot,
'io' => array(
'relay' => array(
$relay => array('relayStatus' => $state)
)
)
), JSON_FORCE_OBJECT);
// Preform the PUT request for setting the relay
$response = $cocos->urlPut($url, $data, 'json', array(
'Accept: vdn.dac.v1',
'Content-Type: application/json',
'Content-Length: ' . strlen($data)
));
// Log output for debugging the script
$cocos->logDebug('PUT ' . $url, "REQ:\nPUT " . $url . "\n> body: " . $data . "\n\nRES:\n" . $response);|
Step 3: Before saving the script change the following variables:
This device name without spaces can be seen under the full device name in the devices list:
|
|
|
Step 4: Give the script a fitting name, and click on the "Save" or "Save and close" button. |
|

3. Create relay/output tag(s)
For our relays/outputs we will now create a (few) tag(s).
The names of these tags must start with relay_ and after that the relay number, since the script we used will use the tag name to identify which relay needs to be switched.
| Step1: Open the device created at 1. Create device, and navigate to the "Taglist" tab. |
|
|
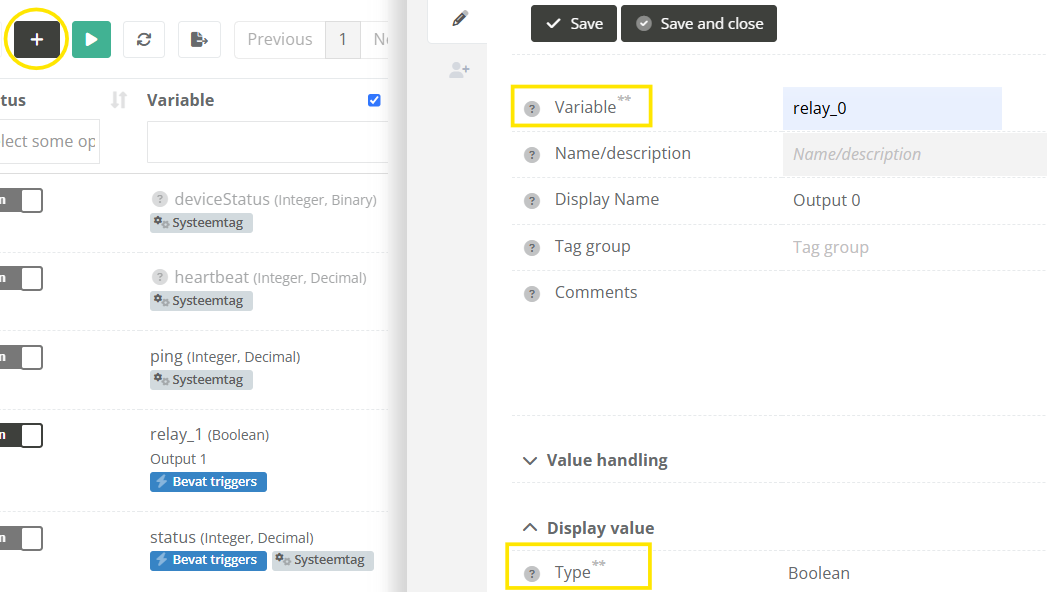
Step 2: Click on the new tag button, and name your tag "relay_<number>". Replace "<number>" with the relay you want to switch. Use 0 when you are unsure, since this relay is used the most in current implementations.
For the tag type, choose "Boolean".
After that click on the "Save" button. |
|
|
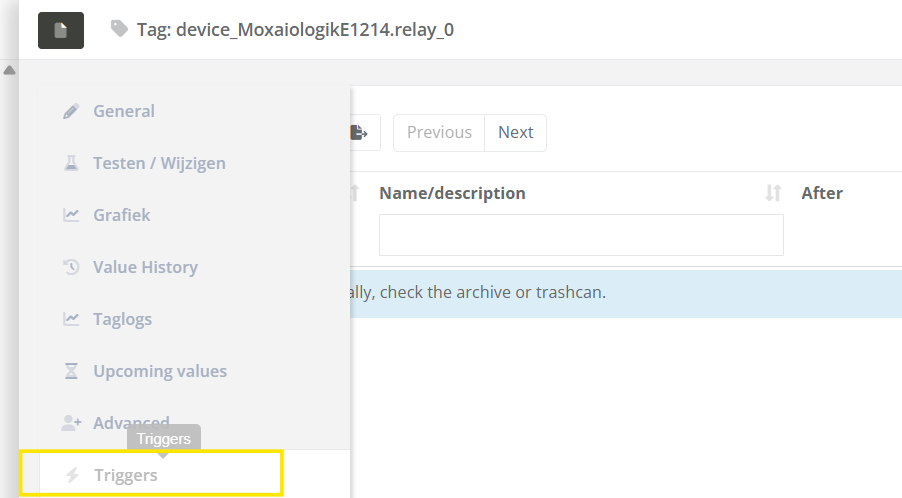
Step 3: Navigate to the "Triggers" tab. |
|
|
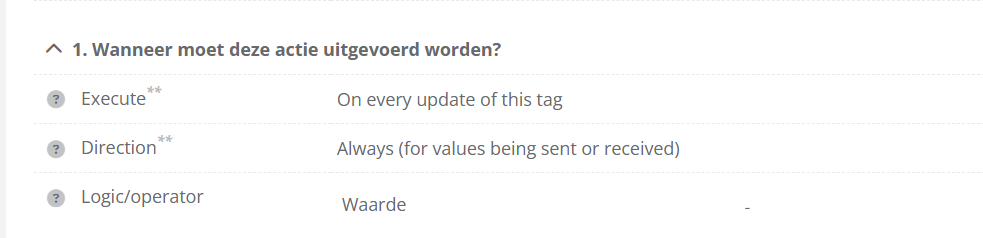
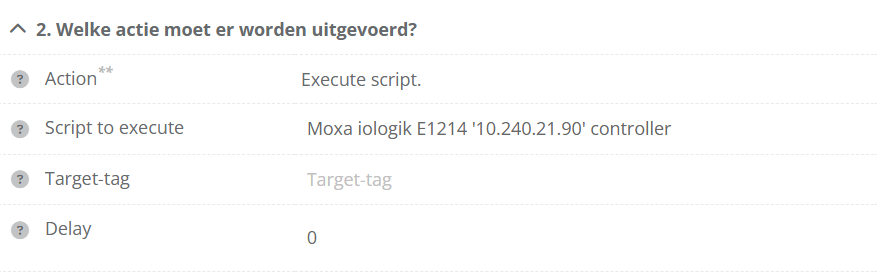
Step 4: Create a trigger that will call the script we created every time the tag has changed (as configured in the image), and click on the "Save" or "Save and close" button.
This will switch the relay to the current tag value. |
|
|
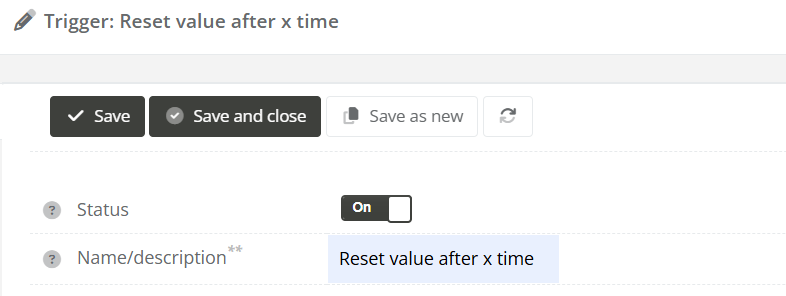
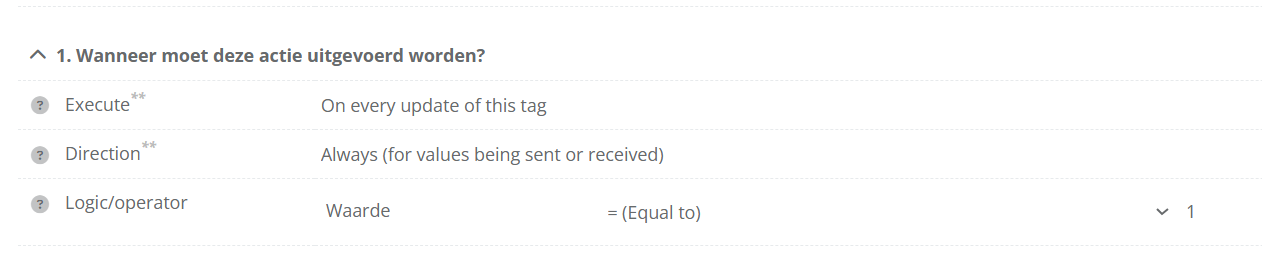
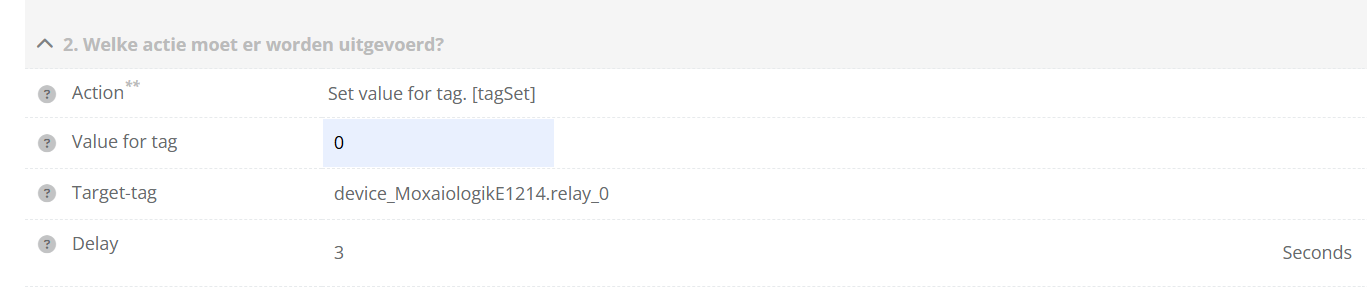
(Optional) Step 5: To make the relay switch back to 0 (off) x seconds after being switched to 1 (on), also add the following trigger (as configured in the image), and click on the "Save" or "Save and close" button. |
|
|
Step 6: Repeat step 3 to 5 for each relay you want to configure. |
|


4. Testing
| Step 1: Click one (or more) of the configured relay tags. |
|
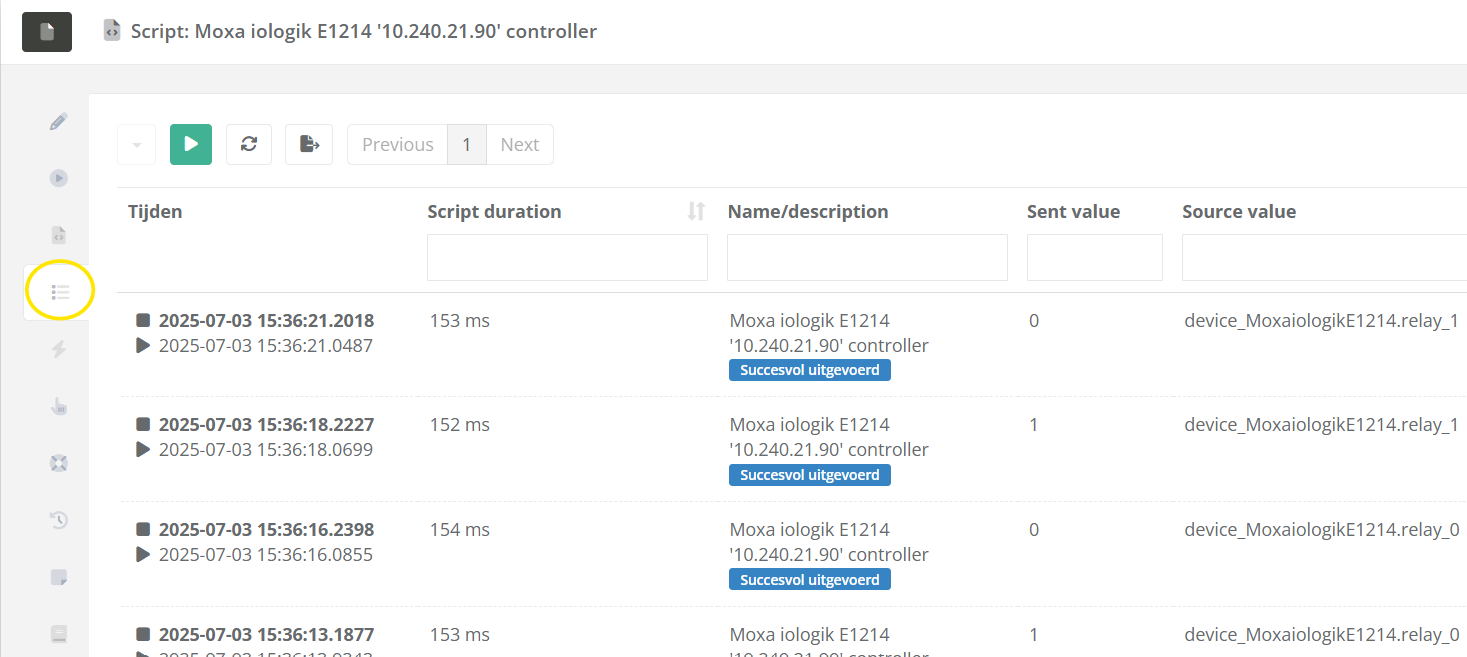
| Step 2: Open the created script, check the "Queue and history" tab to see of the script was executed, and check the "Logbook" tab to see if any issues occurred when executing the script. |
|
No comments to display
No comments to display